Twitterのクローンアプリを作成しながら、React、React Hooks、Redux、Firebase連携、TypeScript についてまなぶ
https://www.udemy.com/course/firebase-react-hookstypescriptweb/learn/lecture
2021-08-27
useState
ステートフック
useState<T>(value) の形式で、参照可能な値と値を更新するための関数を作る
import React, { useState } from 'react';

function Example() {
  // Declare a new state variable, which we'll call "count"
  const [count, setCount] = useState(0);

  return (
    <div>
      <p>You clicked {count} times</p>
      <button onClick={() => setCount(count + 1)}>
        Click me
      </button>
    </div>
  );
}
useEffect
副作用フック 関数コンポーネント内で副作用を実行できるようになる
import React, { useState, useEffect } from 'react';

function Example() {
  const [count, setCount] = useState(0);

  // Similar to componentDidMount and componentDidUpdate:
  useEffect(() => {
    // Update the document title using the browser API
    document.title = `You clicked ${count} times`;
  });

  return (
    <div>
      <p>You clicked {count} times</p>
      <button onClick={() => setCount(count + 1)}>
        Click me
      </button>
    </div>
  );
}
レンダー後になにかの処理をしないといけない、とReactに伝える。
コンポーネント内で useEffect を記述することで、副作用内から state である count(や任意の props)にアクセスできるようになる。
useEffect は毎回のレンダー後に呼ばれる
クリーンアップ用の関数を返すことができる
  useEffect(() => {
    window.addEventListener("mousedown", incrementNum);
    return () => {
      window.removeEventListener("mousedown", incrementNum)
    }
  });
コンポーネントがアンマウントされるときに、returnされた関数が実行される
第2引数に変数を指定することで、その変数の変更時のみ実行することもできる
  useEffect(() => {
    window.addEventListener("mousedown", incrementNum);
    return () => {
      window.removeEventListener("mousedown", incrementNum)
    }
  }, [count]);
空配列を指定すると、なんの変数も監視しない=マウント、アンマウント時に実行される
2021-08-28
material-ui テンプレート便利だな、それっぽいのが作れる
https://material-ui.com/getting-started/templates/
firebase v9は若干インターフェース変わってる firebaseでGoogleログインを実装するにはこちら
https://firebase.google.com/docs/auth/web/google-signin?hl=ja#web-v9_4
yarn add firebaseimport { initializeApp } from "firebase/app";
import { getAuth, GoogleAuthProvider } from "firebase/auth";
import { getFirestore } from "firebase/firestore";
import { getStorage } from "firebase/storage";
const firebaseConfig = {
apiKey: process.env.REACT_APP_FIREBASE_APIKEY,
authDomain: process.env.REACT_APP_FIREBASE_DOMAIN,
databaseURL: process.env.REACT_APP_FIREBASE_DATABASE,
projectId: process.env.REACT_APP_FIREBASE_PROJECT_ID,
storageBucket: process.env.REACT_APP_FIREBASE_STORAGE_BUCKET,
messagingSenderId: process.env.REACT_APP_FIREBASE_SENDER_ID,
appId: process.env.REACT_APP_FIREBASE_APP_ID,
};
const app = initializeApp(firebaseConfig);
export const db = getFirestore(app);
export const auth = getAuth(app);
export const storage = getStorage(app);
export const provider = new GoogleAuthProvider();
import { auth, provider, storage } from "../firebase";
import { signInWithPopup } from "firebase/auth";

const signInGoogle = async () => {
    await signInWithPopup(auth, provider).catch((err) => alert(err.message));
};

const Auth: React.FC = () => {
  return (
            <Button
              fullWidth
              variant="contained"
              color="primary"
              className={classes.submit}
              onClick={signInGoogle}
            >
              Sign In with Google
            </Button>
    )
}
以下のような実装でsignIn, signUpができる。
import {
  createUserWithEmailAndPassword,
  signInWithEmailAndPassword,
  signInWithPopup,
} from "firebase/auth";
  const signInEmail = async () => {
    await signInWithEmailAndPassword(auth, email, password);
  };
  const signUpEmail = async () => {
    await createUserWithEmailAndPassword(auth, email, password);
};
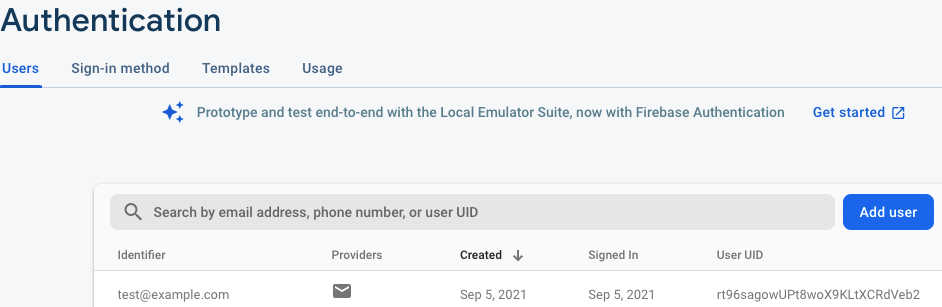
registerを実行すると、Authenticationに追加される